

Overview
When it comes to creating catalogs, schemas, or volumes, that responsibility has usually sat with the infrastructure team. As a developer, you would normally put through a request for a new resource, send a few back-and-forth emails with the Terraform team, confirm all the details, and then, if you were lucky, have the resource deployed within a day or two.
And for teams that are too small to have a dedicated infrastructure team, this often means manually clickops-ing resources across multiple workspaces yourself. That quickly becomes repetitive, difficult to manage, and very error-prone as environments start to grow.
That is starting to change.
Databricks now gives us the ability to deploy catalogs, schemas, and volumes directly through Declarative Automation Bundles (DABs). This means your workspace infrastructure can now live alongside the exact same deployment that manages your jobs, pipelines, dashboards, and everything else inside your workspace.
Why is this such a big deal? Because the infrastructure inside a Databricks workspace can now become independent from the infrastructure surrounding it. It also means developers can define Databricks resources using simple YAML files instead of needing to learn Terraform, which can be daunting when you are first getting started.
In this blog post, we are going to walk through how to deploy your first catalog, schema, and volume from a single bundle so you can start setting up your workspace exactly how you want it.
What are declarative automation bundles (DABS)?
Infrastructure as code for Databricks
Declarative Automation Bundles allow you to take an Infrastructure-as-Code (IaC) approach to managing your Databricks projects. By defining your Databricks resources as YAML files within your bundle, you are able to create idempotent deployments that can be easily customised for each environment. These bundle configurations also live alongside your source code in source control, which is essential for building clean continuous integration and continuous deployment (CI/CD) workflows, especially when working across multiple developers and teams where consistency between environments becomes extremely important.
Moving away from Terraform dependencies
In the past, resources such as catalogs, schemas, and volumes were typically deployed through Terraform, while resources such as Jobs and Pipelines were deployed through bundles. This meant teams often had to manage two separate deployment approaches for infrastructure inside the same Databricks workspace.
Databricks is now removing much of that Terraform dependency by allowing more workspace resources to be deployed directly through DABs. Originally, bundles themselves were built on top of the Databricks Terraform provider to manage deployments behind the scenes. However, Databricks has now introduced a new direct deployment engine which removes this dependency starting from Databricks CLI version 0.279.0.
To deploy catalogs through bundles, you will need to be using the new direct deployment engine. Depending on your existing bundle configuration, this may require some migration work if you are already using older bundles. Schemas and volumes do not require this migration when deployed under an existing catalog.
More information on migrating to the direct deployment engine can be found in the Databricks documentation.
Deploying catalogs, schemas, and volumes with DABs
The following is our project structure. The databricks.yml file sits at the root of the directory and acts as the entry point for the bundle. We then have a resources directory which holds all of the YAML files that define the resources for our bundle.
Inside the resources directory, we have a variables.yml file which contains all of the variables used throughout the bundle. We also have three additional directories: catalog, schema, and volume, each containing the respective YAML definitions for those resources.
databricks-bundle/
├── databricks.yml
└── resources/
    ├── variables.yml
    ├── catalog/
    │   └── blog_catalog.yml
    ├── schema/
    │   └── blog_schema.yml
    └── volume/
        └── blog_volume.yml
The databricks.yml file acts as the main entry point for the bundle. This is where Databricks looks when running bundle commands and where the overall configuration for the deployment lives, such as targets, variables, includes, and bundle settings.
The variables.yml file contains all of the variables used throughout the bundle. Splitting variables out into their own dedicated file helps keep the main bundle configuration cleaner.
The resources themselves are split into separate directories to keep the project structure clean and easier to scale over time. As bundles grow, having all resources in a single file can become difficult to manage very quickly. Separating catalogs, schemas, and volumes into their own directories keeps the bundle more organised and makes it easier to find and update specific resources later on.
Deploying a catalog
When it comes to deploying a catalog, all we need to do is define the resource along with the required parameters. In our example, we are using a variable for the catalog name, setting the storage_root to an Azure Blob Storage location, assigning the Blog Developers group the USE_CATALOG permission, and adding a comment to the catalog for some additional metadata. The USE_CATALOG permission is required for any user or group that needs access to use the catalog.
resources:
  catalogs:
    blog_catalog:
      name: ${var.catalog_name}
      storage_root: abfss://catalog@blogcatalogstorage.dfs.core.windows.net/
      grants:
        - principal: Blog Developers
          privileges:
            - USE_CATALOG
      comment: 'Catalog created by Declarative Automation Bundles'
Below are the variables we have defined inside our variables.yml file.
variables:
  catalog_name:
    description: Name of catalog to be created
    default: blog_catalog
  schema_name:
    description: Name of schema to be created
    default: blog_schema
  volume_name:
    description: Name of volume to be created
    default: blog_volume
Deploying a schema
When it comes to deploying a schema, the process is very similar to deploying a catalog. The main difference is that we now need to define the catalog_name that the schema will sit under.
Because both the catalog and schema are being deployed within the same bundle, we are able to reference the catalog resource directly, which can be seen in the example below. This makes managing dependencies between resources much cleaner and removes the need to hardcode resource names throughout the bundle.
For permissions, we are assigning the Blog Developers group both USE SCHEMA and SELECT. The USE SCHEMA permission is required for any user or group that needs access to the schema, while SELECT grants read-only access to all resources created under the schema through inheritance.
resources:
  schemas:
    blog_schema:
      name: ${var.schema_name}
      catalog_name: ${resources.catalogs.blog_catalog.name}
      grants:
        - principal: Blog Developers
          privileges:
            - USE_SCHEMA
            - SELECT
      comment: 'Schema created by Declarative Automation Bundles'
Deploying a volume
Deploying a volume follows the exact same pattern as the catalog and schema. The main difference is that we now need to define both the catalog_name and schema_name that the volume will sit under.
Because all of these resources are being deployed within the same bundle, we are again able to reference the catalog and schema resources directly.
For permissions, we are assigning the Blog Developers group both READ VOLUME and WRITE VOLUME. These permissions allow users to read from and write files directly to the volume.
resources:
  volumes:
    blog_volume:
      name: ${var.volume_name}
      catalog_name: ${resources.catalogs.blog_catalog.name}
      schema_name: ${resources.schemas.blog_schema.name}
      grants:
        - principal: Blog Developers
          privileges:
            - READ_VOLUME
            - WRITE_VOLUME
      comment: 'Volume created by Declarative Automation Bundles'
Deploying everything together
Now that it is time to deploy our bundle, we first need to add our resources to the databricks.yml file. We do this using the include value along with wildcards to include all of our resource directories. This makes scaling the bundle much easier, as adding additional resources becomes as simple as creating new YAML files under the relevant resource directories.
bundle:
  name: blog_bundle

include:
  - resources/variables.yml
  - resources/catalog/*.yml
  - resources/schema/*.yml
  - resources/volume/*.yml

targets:
  dev:
    default: true
    workspace:
      host: https://workspace-id.azuredatabricks.net
      root_path: /Workspace/Bundles/${bundle.name}
We can then validate and deploy our bundle by running the Databricks CLI commands and specifying the target we want to deploy to.
databricks bundle validate -t dev
databricks bundle deploy -t dev
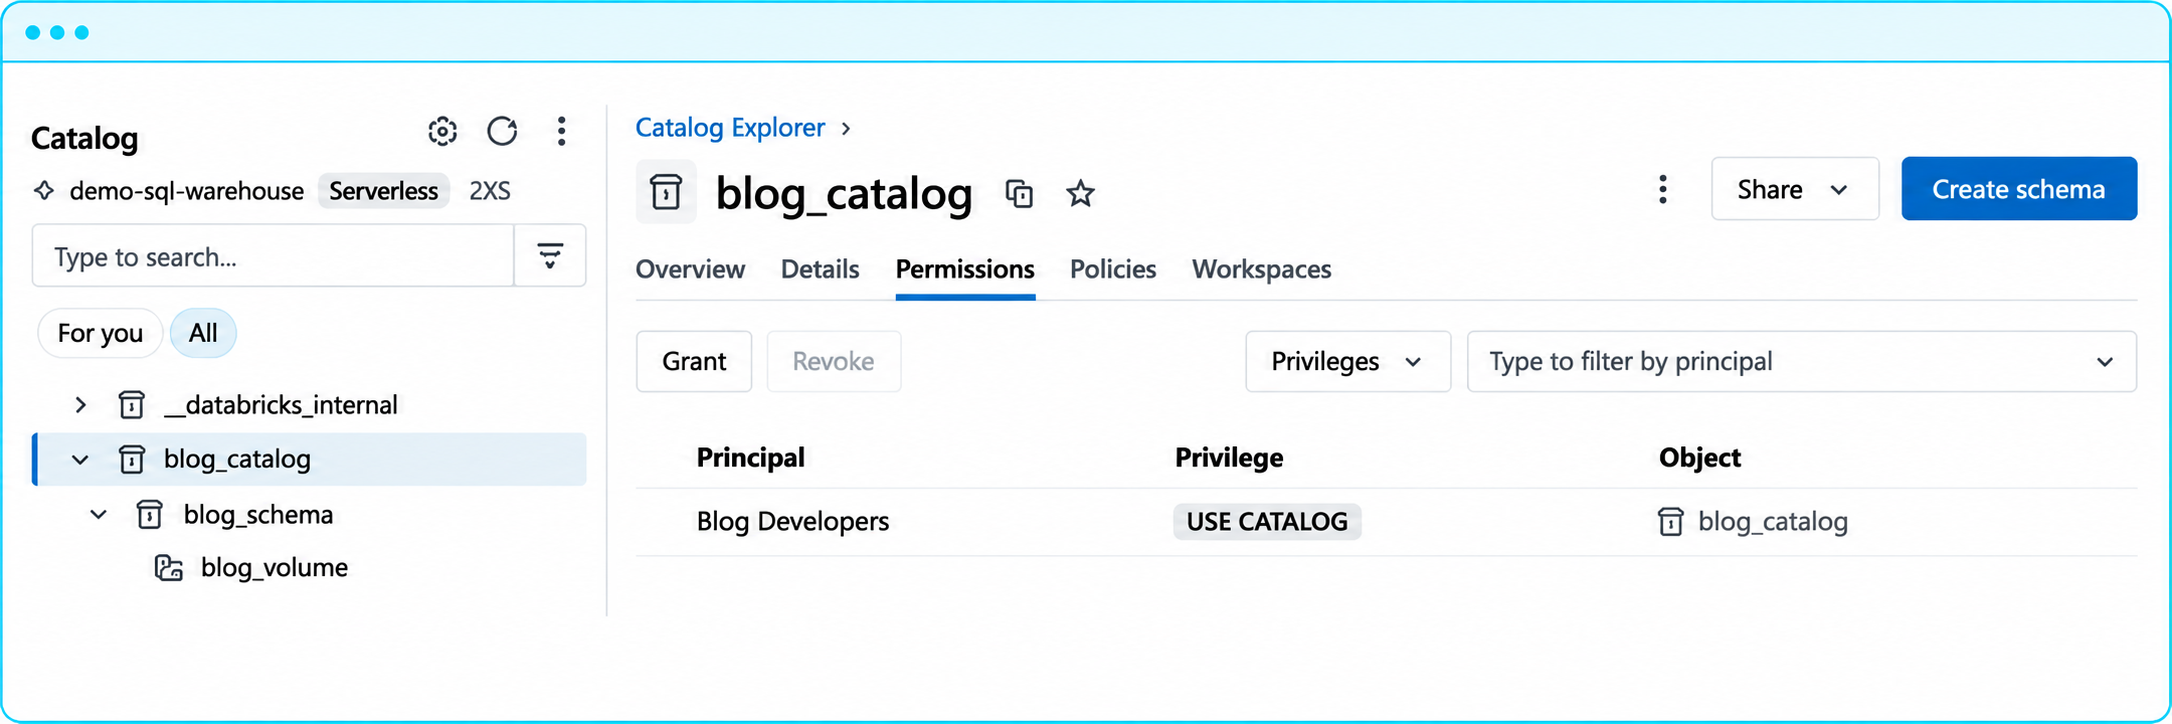
The result is our three resources deployed and ready to use within our specified Databricks workspace, along with the permissions we configured for the Blog Developers group automatically applied as part of the deployment.
Final thoughts
Previously, there was always a bit of a grey area within Databricks where it was hard to tell whether responsibility for workspace setup should sit with the infrastructure team or the Databricks engineering team. In many cases, the Databricks team would be responsible for making the decisions around the workspace design and structure, however, the actual deployment work still had to be completed by the infrastructure team.
This often created delays, extra communication overhead, and another operational responsibility for infrastructure teams that were already managing a large amount of platform infrastructure outside of Databricks itself.
With the new direct deployment engine, Databricks has now given Databricks engineers the ability to manage these resources directly through bundles. This is a huge step forward as it allows workspace infrastructure to live alongside the rest of the Databricks deployment process, making deployments simpler, more consistent, and much easier to maintain over time.
With catalogs, schemas, and volumes now deployable through bundles, it also becomes much easier to include permissions directly into deployments from the beginning, as shown throughout this blog with the Blog Developers group.
If you need more guidance on how to best structure your Databricks Declarative Automation Bundles, feel free to reach out to our team at Adaptiv.