We can’t exactly tell you why the microwave door is open, but we can tell you all about one of MuleSoft’s newest hyped-up products. It’s the latest rage in the MuleSoft development world, ready to revolutionise the game with features so advanced, even Elon Musk might raise an eyebrow.
In this new era of technological advancements, Anypoint Code Builder (ACB) is designed for the future, offering smarter, faster ways to get the job done—thanks to a little help from A.I.
So why replace Anypoint Studio?
Well, why not? Anypoint Code Builder is built right on top of the popular Visual Studio (VS) Code Integrated Development Environment (IDE). By installing the right extensions, you can go back to developing Mule Apps in no time. While Anypoint Studio is built on the somewhat ancient Eclipse IDE, although efforts are being made to keep the base IDE up to date, ACB is being developed to take advantage of the newest technologies and to take advantage of VS Code’s innovative and rich platform. Of course, Anypoint Studio won’t be going anywhere immediately but it would be wise to get on the ACB train before it leaves the past behind.
Shut that microwave door because you might want to sit down for this!
Features Galore
ACB includes a lot of new features designed to make Mule development easier, with new ideas being implemented on the horizon.
Cloud-based IDE
Full, unrestricted MuleSoft development can now be done in the cloud, using the same tools as on a local setup. ACB in the cloud automatically sets itself up within minutes, ready for immediate deployment. This option will appeal to users who don’t have much processing power or prefer to work in the browser rather than installing software on their own machine. It can be rather helpful if you change machines a lot and need something that is consistent no matter where you access from or which device you use. It may also prove useful if your company has a strict I.T. department where users cannot install VS Code. Work at your workstation when you’re in and on your laptop/tablet when you’re out and about.
Workspaces
Workspaces have multiple projects related to each other in the same instance of VS Code, similar to Anypoint Studio but more flexible, and have multiple root folders open at once (Multi-root workspace), each workspace remembers which files were opened and the editor layout. Have workspace scope settings so that the workspace has its own settings and traits independent from other instances of VS Code or workspace.
[Settings are stored in .vscode/settings.json]
API design tools
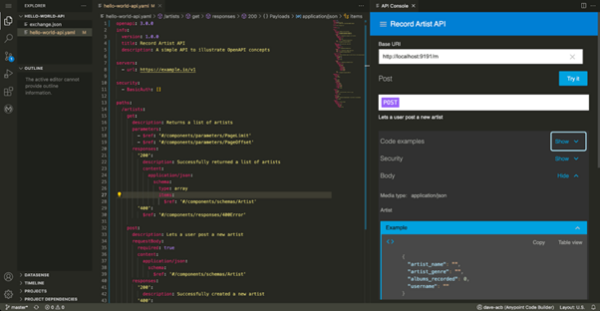
Gone are the days where you had to log into Anypoint in the browser, design your API and then mock it only to have to download it into Mule only to repeat the steps if updates had to be made. ACB now has the API design tools you need to create world-class APIs.
Once you have finished the design specification use the Iterative Scaffolding feature to scaffold the API based on the API specification you just whipped up without ever leaving ACB. The new Mule API Application is created in the same workspace as the API specification. Need to update the design? No drama. Just update, and then changes to the scaffolding are made automatically. Easy.
Another nice thing with API design tools in ACB is that it has a mocking service built in, allowing you to not only create the API spec within the Mule API project but ensure that it is working.
Create the API design in RAML or OAS and mock it, then once you’re done, you can deploy it to Anypoint Exchange.
Dataweave
It is easier than ever before to write your dataweave scripts as ACB also includes a live dataweave editor. Simply write your dataweave script, define sample payloads, and test them directly. No more jumping between DataWeave Playground and your project. Another nice thing about testing your dataweave scripts here is that you aren’t limited to smaller payloads like in Dataweave Playground.
Split view
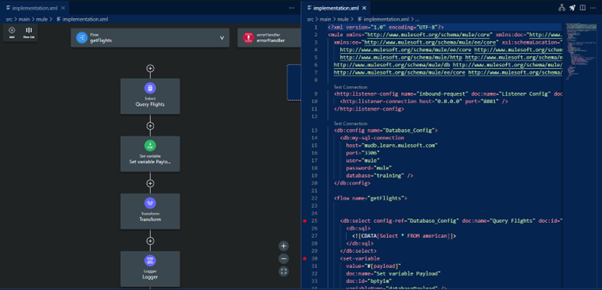
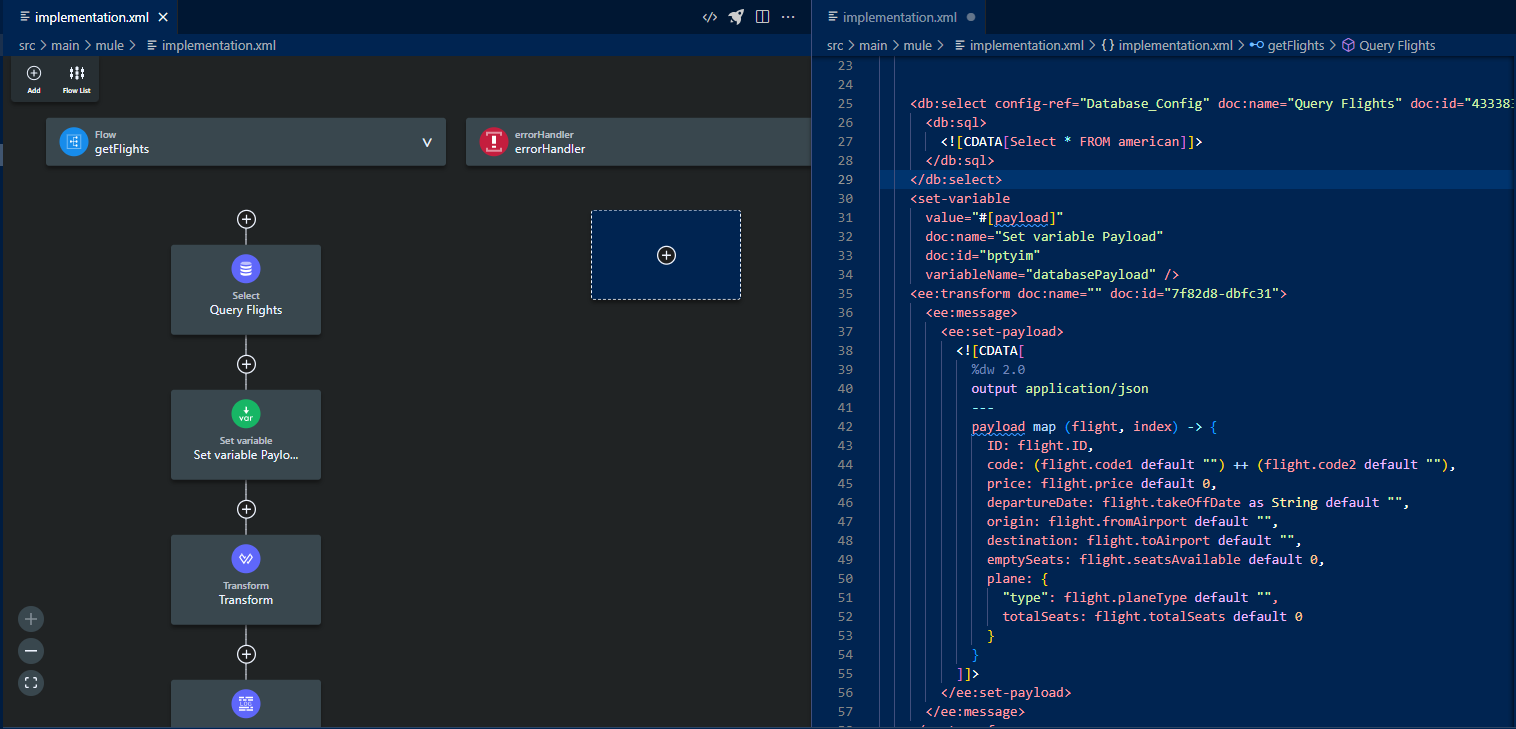
When viewing the Mule configuration files, you can now view both the XML code and a visual representation of the flow side by side. No longer do you have to switch between them like you would in Anypoint Studio.
IntelliSense
ACB uses VS Codes build in IntelliSense feature to assist with writing code. Start typing what you intend to add and then select what you need from the list; press Ctrl + Space if the Intelligence context list doesn’t show. Write code faster and more efficiently.

Command Palette
The Command Palette provided by VS Code gives you the power to perform more actions than ever before in your projects. For example, develop an integration using the ‘MuleSoft: Develop an Integration’ command.

If you are using ACB installed locally, then you can use some of the Mule commands available from other extensions.
Snippets
Snippets are predefined code blocks that can be easily added to your code by simply typing its alias; improve code reusability by adding snippets to VS Code.
Create your own or copying premade snippets by adding the custom snippet via the snippets folder %APPDATA%/Code/User/snippets in Windows or $HOME/Library/Application\ Support/Code/User/snippets in Mac. Or you can add them by navigating to File > Preferences > Configure User Snippets and then selecting a Language from the list. E.g. ‘mule-xml’ for Mule configuration files and ‘data-weave’ for dataweave files. These snippet files are JSON files with a preset name as they are specific to their language. Learn more about snippet files.
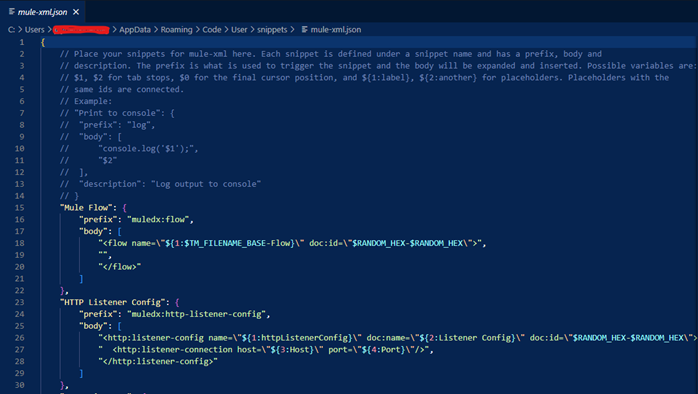
Like any programming language, the JSON snippets have a special syntax. Learn more about snippet syntax.
Source Control
Even though Anypoint Studio had git abilities already, VS Code provides a more streamlined approach to git management, or you can use git commands in the VS Code terminal like you’re stuck in 1986. The Source Control in VS Code is an excellent alternative to other GIT managers such as Source Tree. VS Code also provides handy git tools like Merge Editor and Diff Viewer to resolve merge conflicts. You can also install git-related extensions from VS Code Marketplace.
Check out How to setup Git on Anypoint Studio using the EGit Plugin and Using Git source control in VS Code to see for yourself.
Themes!
VS Code includes a plethora of funky and cool themes to make your ACB environment even more fun and loco while still acting as a professional (talking piece anyone?), or you can just go with a boring… *cough, I mean contemporary theme to just get the job done. You can also customise a Theme to make it more… you, or you can download themes from the VS Marketplace.
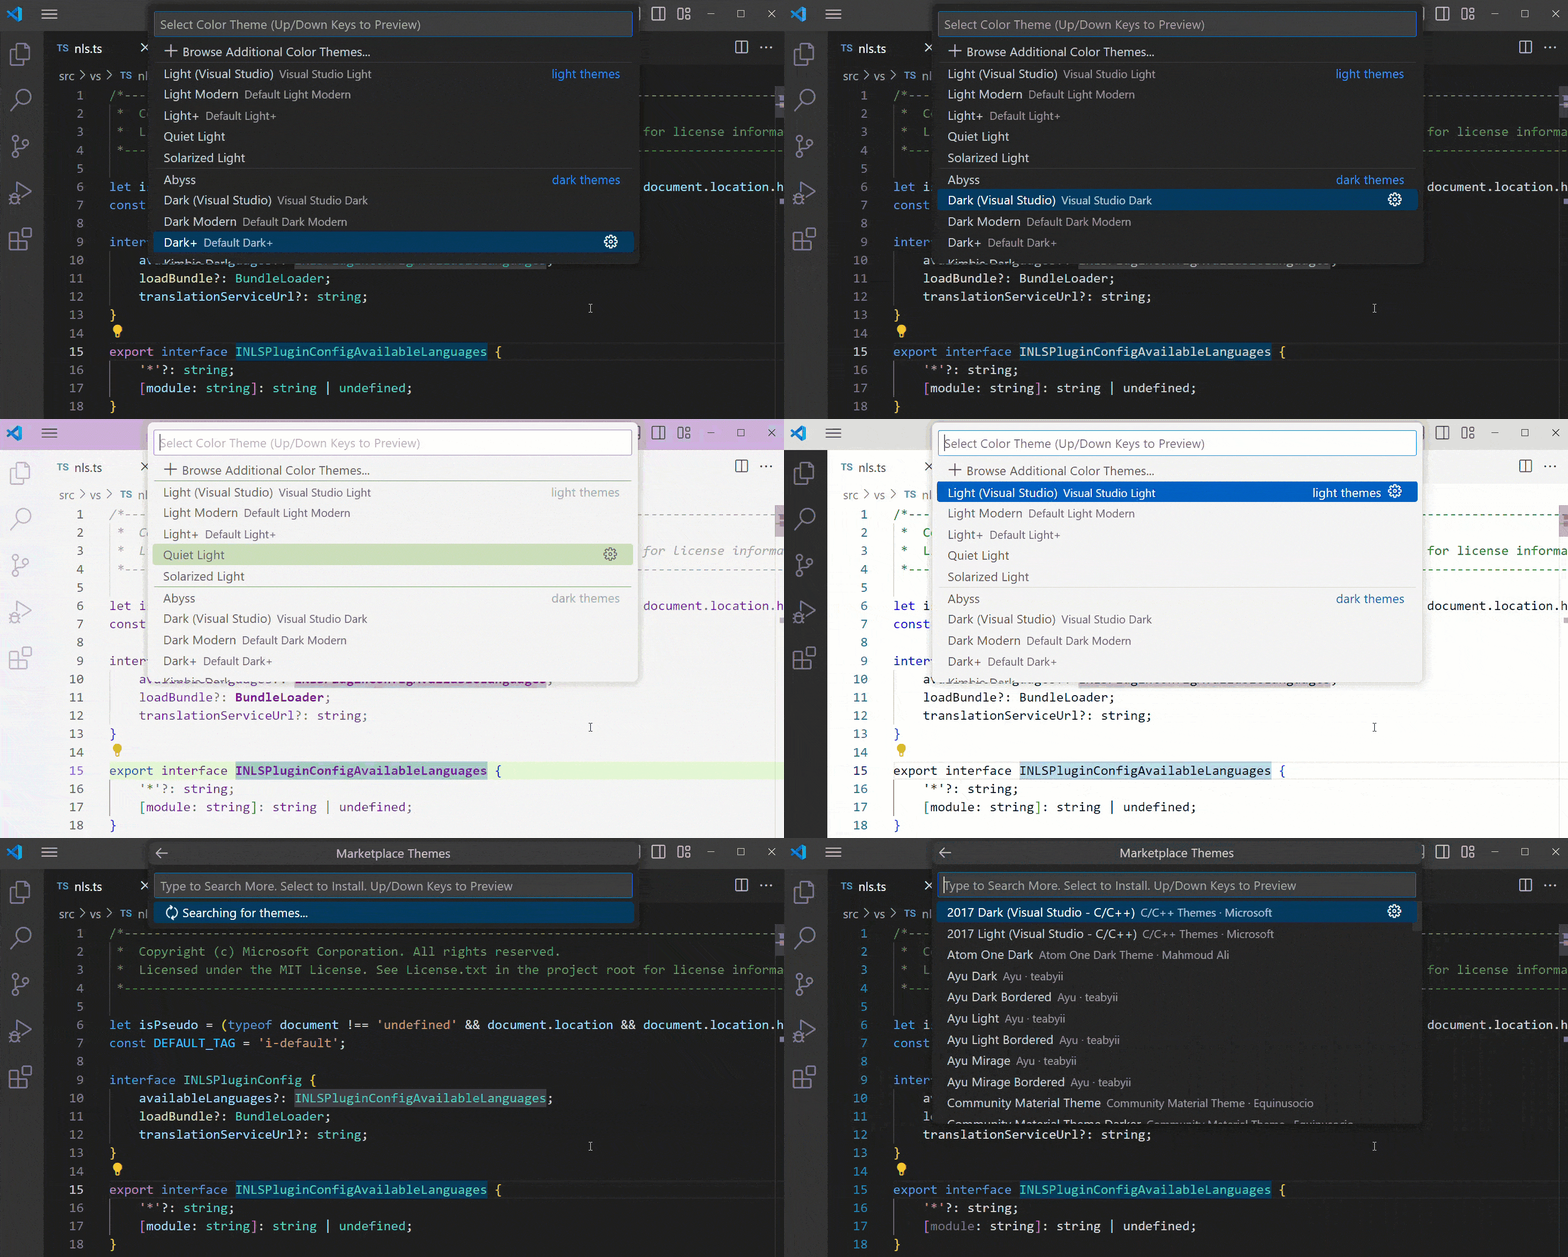
Check out VS Code Themes to learn more.
Einstein GPT
Say what now! You heard me. ACB has its own AI now… yeah, I know, another AI thing… argh! Einstein AI is built right into ACB and can help you generate code and integration flows quickly by using its natural language engine. Einstein will automatically bring in any dependencies required when it adds the generated code to your project.
It is limited to generating code and flows at this stage but will eventually be able to do even more amazing things.

Features to Come
While the future looks super bright for ACB, quick grab some sunnies. It is still a way from being in its complete state; many new and necessary features will be added to over time ensure that ACB is at the same level as Anypoint Studio, for example, MUnits are currently not included with ACB but will be added in the near future.
Let’s Get This ACB Started
Local Machine
Use VS Code ACB extension on your local machine like the good ol’ days. Continue building your API dreams (or nightmares) on your local machine like a boss, because cloud computing is overrated. This is an excellent option to remain in control, your computer, your rules, unless it’s a company issued PC then it’s up to your I.T. department. Donuts and Coffee usually work in this case (I don’t know; I’ve never tried it… let me know how you get on).
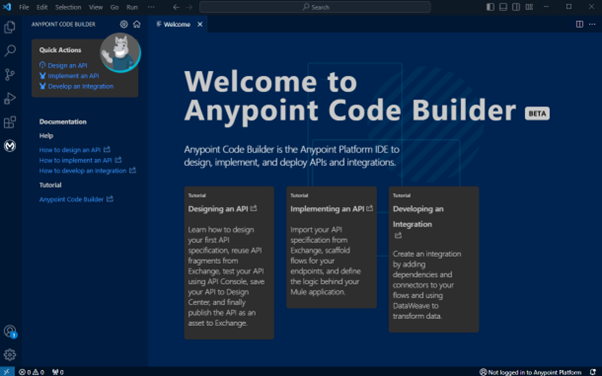
First things first, you will need to install Visual Studio Code 1.76.1 or higher and Git. Then install the Anypoint Code Builder extension pack ‘Anypoint Extension Pack’ from the VS Code Marketplace. Be sure only to install the extension pack; installing the extensions individually will not work correctly.
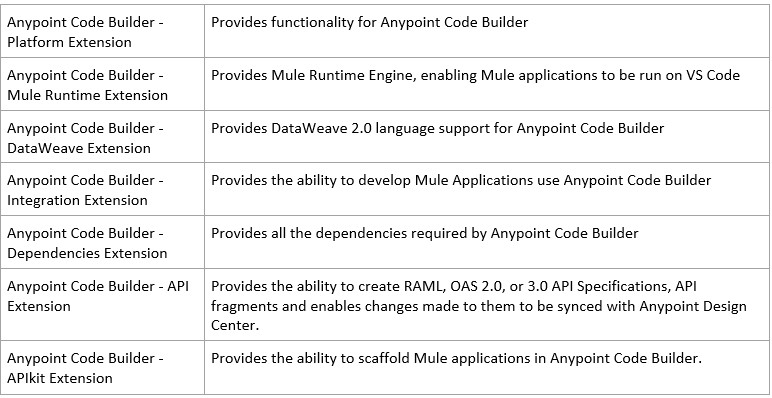
Anypoint Extension Pack includes the following extensions in the table below:
Once setup, log into Anypoint by clicking the ![]() button on the bottom right. Follow the prompts and click ‘Allow’ when necessary.
button on the bottom right. Follow the prompts and click ‘Allow’ when necessary.
Or you can log in by opening the command palette with Ctrl+Shift+p (Windows) or Cmd+Shift+p (Mac) and searching “MuleSoft: Login to Anypoint Platform”

ACB in the Cloud
Step into the future and build your APIs using, well… anything. Use your laptop, tablet, phone, tesla or toaster (probably not your toaster). The point is, you can start building high-quality APIs from anywhere using any device without having to install anything; if you have the latest version of Chrome, Firefox or some other browser I don’t care about. Long gone are the days when you need to install things… yuck. Leaving more time to get a Frappuccino Ice Latte Thingamajig with sprinkles from Starbucks. Keep in mind that Cloud ACB is still in beta but will become GA very soon.
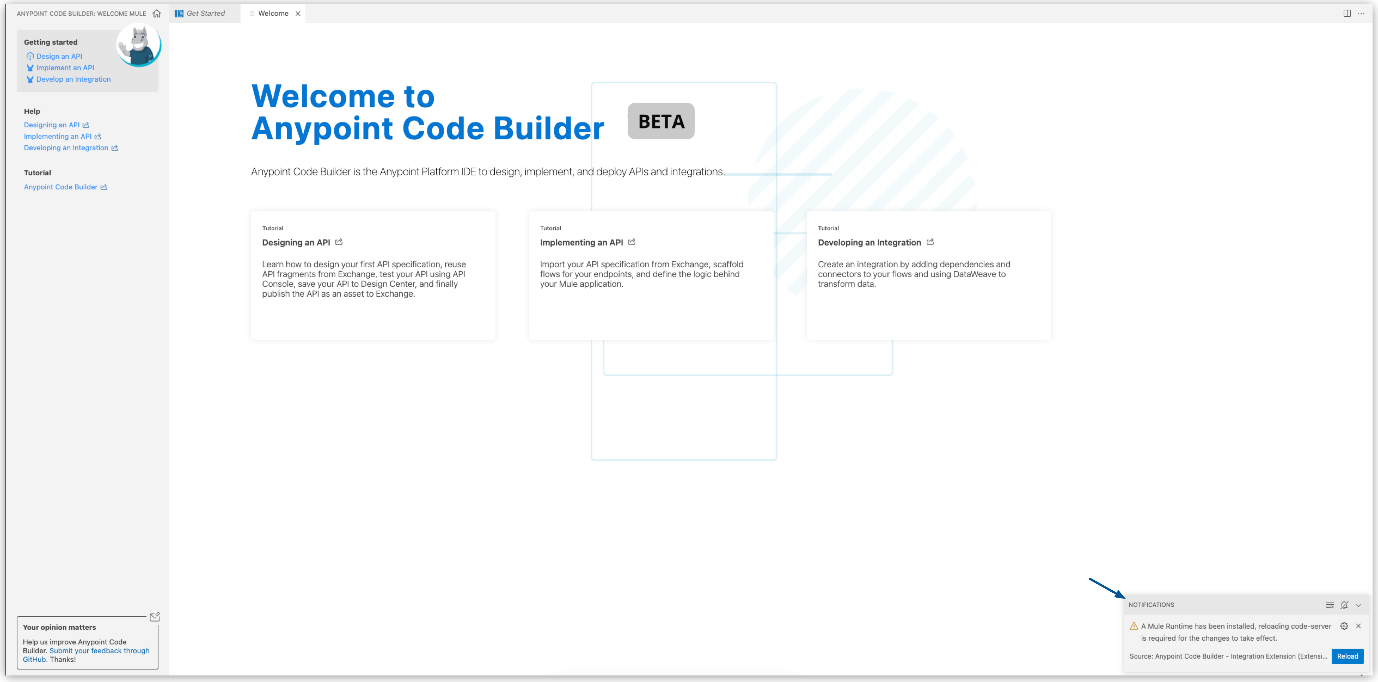
Before you can use ACB in the cloud IDE, you must have an Anypoint account; You can use a trial account. For existing accounts where you are not an administrator, you will need to ask your organisation administrator to accept the terms and conditions and provide you with access to Anypoint Code Builder. See Configure Permissions.
To access ACB the cloud IDE:
- Log into the Anypoint platform by going to https://anypoint.mulesoft.com/login/
- Accept the terms and conditions
- Click ‘Launch Cloud IDE’
Once the Cloud IDE has been initialised, you can start developing from anywhere with any up-to-date internet browser-compatible device.
Going with the Flow
ACB has a new approach when it comes to managing flows. ACB will show the canvas and configuration text editor in a split-screen view.
Configuring Flows
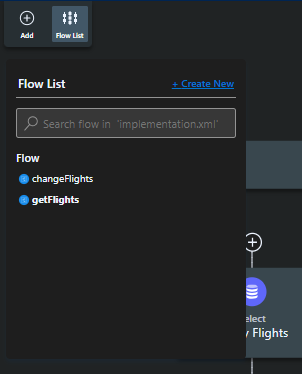
Building flows in ACB are a bit different from those in Anypoint Studio. No longer will you see all the flows in the same canvas; they will still be in the same Mule flow file. Instead, you can select the flow you wish to work on. The current flow will appear on the canvas.
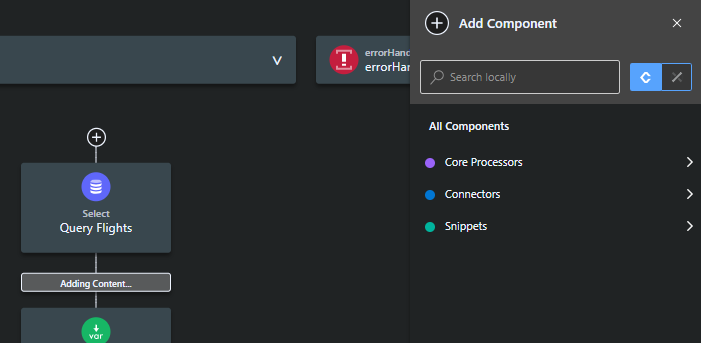
You can add processors to the flow by clicking the ‘+’ button under or above another processor. Where you click is where the new processor will be added, the add button will change to show the message “Adding Content…”. You can either search for the desired processor or navigate through the ‘All Components’ list. Click on the process to add it to the flow.
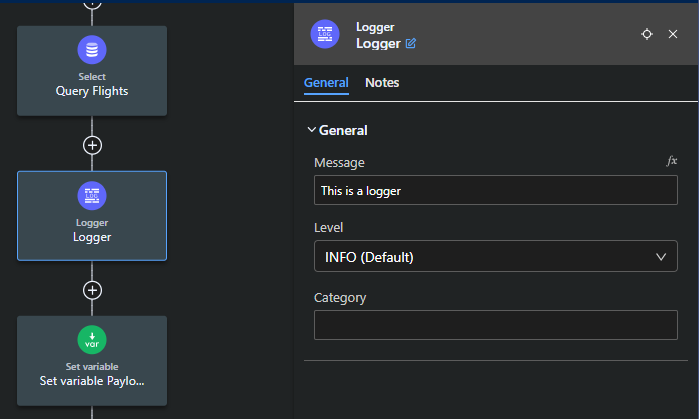
Click on the processor to bring up the configuration editor pane. Close the pane once the processor has been configured.
Debugging Flows
ACB lets you debug flows more naturally. Clicking the empty space to the left of the code numbering in the XML editor will show a red dot, and you can step through those debug points.
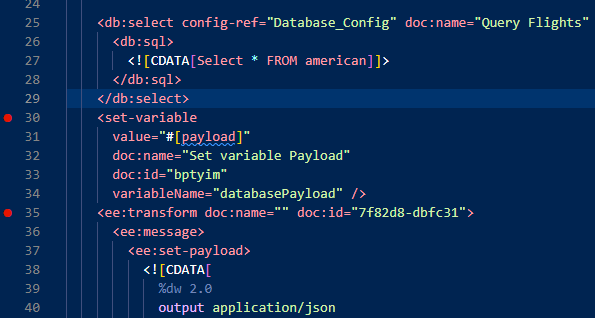
Enter debugging mode by selecting the ‘Run and Debug’ tab from the left-hand side. Then select ‘Debug Mule Application’ and then click the green play button or press ‘F5’ on the keyboard. You can add custom run/debug configuration options as well.
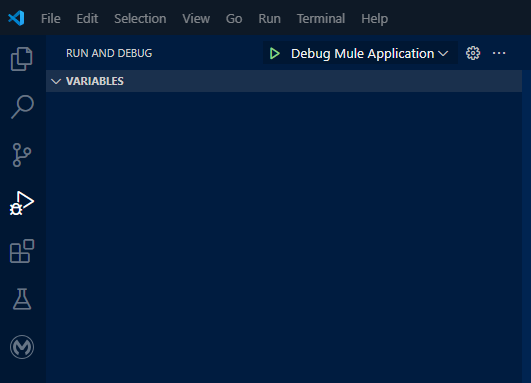
It will take a few minutes to build the project and run it. Keep an eye on the logs from the VS Code output pane and ensure ‘Mule Maven Output’ logging is selected on the right-hand side. Also, use it to ensure logs are being written correctly.

Step through or over the Mule processors using the VS Code debugging control panel.
![]()
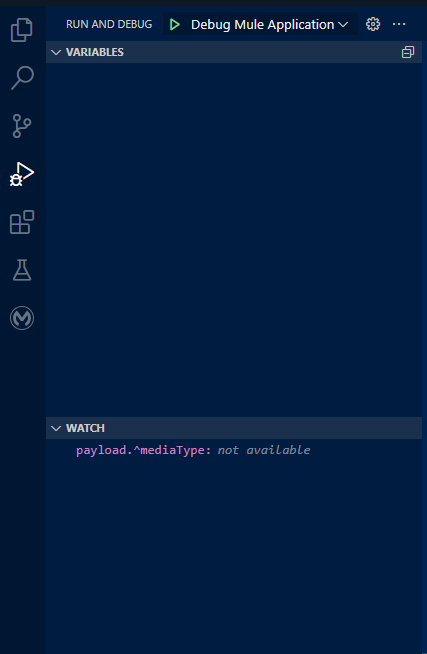
View and watch variables in the ‘Run and Debug’ pane.
My 10 cents and a piece of lint (Conclusion)
Anypoint Code Builder (ACB) is a game-changer for MuleSoft development, blending modern technology with the flexibility and power of VS Code. With features like a cloud-based IDE, enhanced API design tools, live Dataweave editor, and intuitive debugging capabilities, ACB is set to revolutionise the way we build and manage Mule applications. As MuleSoft continues to innovate, getting ahead with ACB will ensure you’re not left behind with outdated tools.
So, close that microwave door, settle in, and get ready to embark on a new era of Mule development with Anypoint Code Builder.


